This blog was created to share quick tips, cake and cookie designs, product information and other things cake and cookie decorators want to hear in order for all of us to learn and grow together. Please feel free to send me an e-mail (cakecookiecloset@aol.com) if you have comments on any of my blogs or suggestions for another blog.

Thank you. Debra J. Mosely


Check out the new Cake & Cookie Closet Online Store

Link: http://astore.amazon.com/thcacoclbl-20

Monday, July 5, 2010

It's Finally Here! You May Already Be a Supervip.

Introducing… Supervip Cake & Cookie Closet!

Today marks the start of something big! The Supervip Cake & Cookie Closet group launched July 1st on Facebook. It contains new buttercream and fondant cakes, cupcakes and fondant-covered sugar cookie designs. More cake, cupcakes or cookies will be added on a weekly basis. Pretty soon this group will contain more cake and cookie designs than the book!


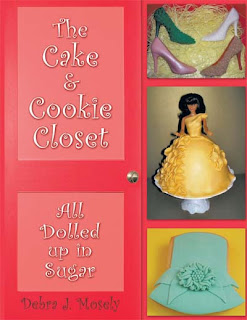
Membership in this exclusive group consists of people who bought their copy of The Cake & Cookie Closet: All Dolled Up in Sugar directly from me or a member of my sales team. It’s my “thank you” to you for coming on this journey with me and will continue to be updated as often as I create new wardrobe-inspired cakes, cupcakes, sugar cookies and chocolates. If you have not received an e-mail invitation from me, please send an e-mail to cakecookiecloset@aol.com.

Happy Fourth of July


I hope that you had a wonderful Fourth of July holiday celebration. I’m so grateful for the freedom we have to live as we please and to our incredible military and their families for the sacrifices they make to keep us safe.

The Cake Side…


My wonderful friend Joanne Fredette’s 60th Birthday Cake.


Stacked Cakes - Use Wilton’s 12” long plastic dowels when you need to stack cakes like the one above. I believe they are more effective than the wooden dowel rods. I used three plastic dowels (cut to fit) in the 10” base cake and then a plastic dowel all the way down through the top cake into the bottom cake. This cake traveled 50 miles in hot weather and nothing moved. The white chocolate daisy covered the hole on top.

Pound Cakes - Pound cakes are incredible for making edible masterpieces. They are easy to sculpt and there are so many different flavor combinations for you to try. And, one sheet cake can make a lot of miniature purses or other treats.

Cake Fillings - Need to know more about what cake fillings to use now that it’s warm outside? Check out my article here.

Featured Cake Recipes

Here are a couple delicious recipes my wonderful friend Bonnie Smith shared with me. I’m not sure where she got them but they’re good. Enjoy.


Brown Sugar Pound Cake with Rum Sauce
(Author Unknown)

1 cup (2 sticks) butter, softened
2 cups Domino Dark Brown Sugar, firmly packed
6 large eggs
3 cups all purpose flour
1/2 tsp salt
1/2 tsp baking powder
1 cup milk
2 tsp vanilla

Preheat oven to 325° F. Grease and flour a 10 inch tube pan. Cream butter and sugars until very light and fluffy. Add eggs one at a time, beating well after each addition. Combine dry ingredients, then add to batter, alternately with milk, beginning and ending with the flour mixture. Add vanilla. Fill prepared ban and bake for 1 hour and 35-40 minutes or until toothpick inserted in center of cake comes out clean. Cool cake completely, then remove from pan. To serve, drizzle with rum sauce.

Caramel Rum Sauce
(Author Unknown)

1/2 cup whipping cream
1/2 cup butter
1/2 cup Domino Dark Brown Sugar
1/2 cup Domino Granulated Sugar
2 T light corn syrup
3 T dark rum

To prepare Caramel Rum Sauce, combine cream, butter, sugars, corn syrup and rum in heavy saucepan. Bring to boil over medium heat, whisking occasionally. Cover and continue to boil for 1 minute to wash sugar crystals from the side of the pan. Uncover and continue to boil for 3-4 minutes without stirring. Cool slightly. Drizzle over cake.

Coconut Pound Cake
(Author Unknown)

1 cup butter
1 (14 oz.) pkg. coconut
3 cups sugar
2/3 cup Crisco shortening
3 cups plain flour
6 eggs
1 cup milk
1 tsp baking powder
2 tsp coconut flavoring

Cream butter, shortening and sugar until fluffy; add eggs. Beat well. Add flour, baking powder and milk alternately to egg mixture. Beat well; add flavoring and beat. Fold in ½ of package of coconut. Place in tube pan. Bake at 300 degrees for 1 hour and 30 minutes. Cool in pan.


The Cookie Side…

Tool Spotlight - Crimpers


Crimpers are fabulous little tools that work like tweezers. There are a lot of different shapes you can try. I just discovered the straight crimpers and LOVE them. Here are pictures of what I’ve created with them. You squeeze them together and imprint designs onto fondant, gum paste and candy clay. They work great on fondant-covered sugar cookies as well. On cakes, you can crimp the top and bottom borders or create intricate custom designs all over your cakes. On cookies, you can use them to create texture where you want. Think monogram cookie borders. The rubber bands on the crimper can be moved up or down to regulate the width of the crimped design.


Difference between crimper and impression mat. Both beautiful but very different results. Crimp tool on fondant-covered cookie gives you texture and very quick results.  These are new designs featured in the Supervip Cake & Cookie Closet group on Facebook.
Featured Cookie Recipes

Maple Sugar Cookies
(Author Unknown)

1 cup Crisco shortening
4 cups flour
3/4 cup Vermont Maple Syrup
2 tsp baking soda
1 cup white sugar
1/2 tsp salt
2 eggs, well beaten
2 tsp vanilla
2 tsp milk

Cream together butter, sugar and syrup. Add eggs, milk and vanilla. Add flour, baking soda and salt (sifted together). Mix all thoroughly.

Method 1) Chill dough well then roll out thin on floured board and cut with cookie cutter.
Method 2) Drop by teaspoonful onto greased pan, flatten with glass dusted with sugar.

Bake on greased cookie sheet at 350 degrees for 10 minutes.

Sugar Cookies – The Big Recipe

(H.O. Foose Tinsmithing)

6 cups flour
3 tsp baking powder
2 cups butter
2 cups sugar
2 eggs
2 tsp vanilla extract
1 tsp salt

Beat butter and sugar together until creamy. Add eggs and vanilla and mix well. Combine dry ingredients and then add to the butter mixture, mixing well. Roll 1/4” think and cut shapes. Bake at 350 degrees for 8 to 10 minutes. Cool on rack. Makes about 8 dozen 3” cookies, soft and not crispy. These will freeze well so you can make them ahead of time and then thaw before decorating for your special event.

Bonus Recipe…

This is one quick and easy recipe I can never make enough of for my family. Enjoy.

Peach Enchiladas
(Author Unknown)

2 (8 oz.) packages refrigerated crescent-roll dough
4 firm peaches, peeled, pitted, quartered
1-1/2 cups sugar
1 cup butter, melted
1 teaspoon ground cinnamon
1 (12 ounce) can citrus-flavored soda, such as Mountain Dew

Preheat oven to 350°. Coat a 13x9x2 inch pan with nonstick spray. Set aside.  Unroll crescent rolls, separate into triangles. Place 1 peach quarter on wide end of triangle. Roll up from large end to small end to encase peach slice. Place in prepared pan. Repeat with remaining dough and peaches. In a small bowl, combine sugar, melted butter and cinnamon. Pour mixture over rolls.  Pour soda over top. Bake for 45 minutes.


Companies to Check Out…
Listed below are new favorites.

http://stores.ebay.com/Megans-Silicone-Molds - Megan offers free shipping on all silicone molds to U.S. addresses. She also has crimpers.

http://www.cookiecuttercraftingkit.com/ – I received The Cookie Crafting Kit as a gift from Sallee McCarthy at Fran’s Cake & Candy. Since then, I’ve been on a cookie cutter making frenzy. I love creating my own designs!!!! Check out this kit if you’re having a hard time finding cookie cutters for projects. This kit contains everything but the snippers or heavy duty scissors to cut the tin. Click on their store link to see what cookie cutters they have in stock.


*     *     *


You can order an autographed copy of my wonderful new book, The Cake & Cookie Closet: All Dolled Up in Sugar, at http://www.thecakeandcookiecloset.com/.   Please share this newsletter with people you know who love to bake.

Thursday, June 3, 2010

My Ideas… Your Ideas… Finding Common Ground


As a cake and cookie decorator who loves to create simple designs that people can use to create awe-inspired treats, you provide the oven that helps me bake the cakes and cookies to your custom order. Without YOU, The Cake & Cookie Closet: All Dolled Up in Sugar would still be a dream in my heart instead of a book that is making its way around the country. The initial focus was on wardrobe-inspired treats for women. Next week, the Wedding Cookies booklet will make its debut. There’s more about this in the cookie section below.

In order to continue to provide exceptional service to you, I would appreciate a couple minutes of your time to answer a survey. Improving your experience both here in the newsletter/blog and on the Facebook fan page is my primary goal so here’s the link:


Feedback is an incredible thing. What it has given when asked of Facebook fans is amazing. Some people chose to send e-mails and that’s always fine with me, however, I believe other decorators may need to see my answer to you as well so it’s okay to post your comment on the fan page. Specific topics are being requested in mini booklet form that will sell for less than $10. An example is a booklet full of only cupcake purse designs that would be sold to fans for $9.99. Check out the list of suggested topics and add other suggestions here.

For sharing your comments and making suggestions for the future path of The Cake & Cookie Closet, I’ll forever be grateful. That’s one of the reasons I decided to offer a 20% discount off of all the books or booklets in the Shop Now tab on the Facebook fan page. This discount is not available on http://www.thecakeandcookiecloset.com/. It’s available to fans only here so please feel free to share this information with your family members and friends.

Because of you, I’ve expanded my horizons and know that I can give you want you want so feel free to ask questions and make suggestions. We’re a team, and I will help you reach your goal of becoming a cake and/or cookie designer who can create amazing cakes, cookies and other delicious treats in a short amount of time.

To Blog or Not to Blog, That is the Question

When the e-mail went out to say that The Cake & Cookie Closet Newsletter would be turned into a blog, some people suggested that I keep the newsletter format. Please let me know by return e-mail whether your preference is the link to the blog or the newsletter version, and I will create two lists. Your satisfaction is important.  Debra

The Cake Side…

Toba Garrett is one of my favorite culinary instructors. She is a master, and I hope that you check out her work. My goal is to take one of her classes soon. In the meantime, here’s my favorite cake recipe of hers. It’s from her Well Decorated Cake book.

TOBA GARRETT’S MOIST YELLOW CAKE

3 cups cake flour
1 Tbsp baking powder
1/2 tsp salt
1 cup unsalted butter, room temperature
2 cups sugar
5 large eggs
2 tsp pure vanilla extract
1-1/4 cups buttermilk

Preheat oven to 350 degrees. Butter and line with parchment paper two 8”x2” pans. Set aside. In a medium bowl, sift together the flour, baking powder and salt. In another bowl, beat the butter on medium high speed for 3 minutes (or until light and creamy in color). Stop and scrape the bowl then cream for another 60 seconds. Start adding the sugar, 1/4 cup at a time, beating 1 minute after each addition. Scrape the sides of the bowl occasionally. Add the eggs one at a time. Reduce your mixer speed. Stir vanilla into buttermilk. Add the dry ingredients alternatively with the buttermilk. Mix just until incorporated. Scrape the sides of the bowl and mix for 15 seconds longer. Spoon the batter into the prepared pan and smooth the top with a knife. Lift up the pan with the batter, and let it drop onto the counter top to burst any air bubbles, allowing the batter to settle. Center the pans onto the lower third of the oven and let bake 45-50 minutes or until the cake is lightly brown on top and comes away from the sides of the pan and a toothpick inserted in the center comes out clean. Let the cake cool in the pan.

Storage: Double wrap the cake in plastic wrap. It will keep in the refrigerator for up to 2 weeks or in the freezer for up to 2 months.

NOTE: This recipe is perfect for making sculpted cakes, ice cream cupcakes, miniature loaf cakes, and simple butter cake with white or chocolate buttercream to use as a birthday cake. Speaking of chocolate buttercream, have you tried adding espresso powder to it? It is amazing. Start with a tablespoon blend well and sample. You will enjoy it.


Cakes or Cupcakes? Cupcakes have gained in popularity. Most times they’re just covered in frosting. Be creative and make individual treats in different colors to add interest. These tiered trays are great for showcasing individual desserts.

PROJECT: Cupcake dresses are easy to make. The top two shelves are made with ice cream cupcake molds baked, cooled and lightly iced in frosting. Cover with fondant using various tools and techniques. The bottom shelf is a regular-sized cupcake (fondant topper is cut with a 3” round circle) with a regular-sized marshmallow added on top as the bodice. Take a regular marshmallow, lightly frost it around the sides and add frosting to the bottom and sit on the center of the cupcake. Wrap fondant around the marshmallow (dry fit the fondant to the marshmallow before you add the frosting to make this easier). Have fun decorating with fondant flowers, presses, stamps and icing tips (try them on fondant to see what kind of imprints they make). If you want, you can add melted chocolate to the top of the marshmallow or lightly frost it and add a circle fondant topper pressed down the sides to make the top the same color as the dress.

The Cookie Side…

The new booklet, The Cake & Cookie Closet presents Wedding Cookies, Volume 1, has been re-designed to be a smaller version booklet, instead of a full-sized book like The Cake & Cookie Closet: All Dolled Up in Sugar. It features wedding cake cookies, cookies especially for the bride, cookies especially for the groom, his & her cookies, as well as monogram cookies. It is being featured exclusively on the Facebook fan page here. Once you become a fan, select the Shop Now tab to see the booklet. More booklets that specifically address one subject areas will be featured in the next couple months. I hope that you enjoy these booklets and look forward to hearing your suggestions on which ones you want to see.


It’s definitely wedding season! Grab yourself a 4-tier wedding cookie cutter and start being creative. This is one of the cookies featured in the new Wedding Cookies booklet.

This lingerie is featured in the Wedding Cookies booklet and is very easy to re-create in whatever color fondant you chose.

A different tiara and shoes are featured in the booklet. I just wanted you to see how you can take two different cookies and make them a matching pair. Tiara cookies are great gift ideas on their own but when featured with a shoe cookie (or pair of shoes), they’re even more special.

Featured Cookie Recipe

BASIC SUGAR COOKIES II

1 cup unsalted butter, softened
1-1/2 cup sugar
2 extra large eggs
1-1/2 tsp pure vanilla
3-1/2 cups all purpose flour
1/2 tsp salt
2 tsp baking powder

Cream butter and sugar until light/fluffy. Scrape down sides. Add eggs and flavors. Mix well. Scrape down sides. In another bowl, mix together dry ingredients (I take a whisk and blend them together). Add a little at a time to your butter mixture. Blend until flour has been completely incorporated and the dough comes together. Divide dough in half and place in Ziploc containers. Place in the refrigerator for at least 4 hours until chilled. Roll to desired thickness and cut into desired shapes. Bake on ungreased baking sheet at 350 degrees for 8-10 minutes or brown around the edges.

Recipes makes 3-4 dozen cookies depending on what size cookie cutters are being used.


June Class Schedule…

There are only going to be a couple classes scheduled through Cookology this month. Please check their website for more information. www.cookologyonline.com. My schedule is currently full with private parties and classes.


Bonus Recipes…

As you go through the blogs every once in a while, you’ll see bonus recipes. These are not cakes or cookies, though they can definitely be used at any party or function you give. These are two of my favorites. Let me warn you. They are addictive. Please share with others or you’ll want to strangle me for sharing the recipe with you. And, whatever you do, don’t tell my family members I found these or I’m in trouble. 

CINNAMON ROLLS
(from the All in One Bake Shop)
http://www.allinonebakeshop.com/

Dough
1 pkg dry yeast
4 cups all purpose flour
1 cup heavy cream
6 Tbsp unsalted butter
1/3 cup light brown sugar
1/2 tsp salt
3 large eggs

Filling
1-1/2 cups light brown sugar
1/2 cup all purpose flour
2 Tbsp ground cinnamon
1 cup unsalted butter, cut into pieces

Icing Glaze
2 cups confectioner’s sugar
1 tsp pure vanilla
3 Tbsp heavy cream

Dough - In a large mixing bowl, combine 2 cups of the flour and yeast. In a medium microwave safe bowl, heat butter, cream and brown sugar to about 120 degrees F in the microwave. Add butter mixture and eggs to flour mixture. Mix, adding the extra flour until the dough reaches a kneadable consistency. Knead for 3-5 minutes. Dough should be soft. Shape into a smooth round ball. Place in lightly oiled bowl. Cover with plastic wrap. Place in a warm place to double in size (approximately 1 hour).

Filling - Make filling by combining butter, flour and brown sugar until mixture resembles a crumb topping. Refrigerate until ready to use.

Punch down dough. Divide dough in half. Place on lightly floured surface and roll out to about a 8” x 12” rectangle. Sprinkle half of filling on top. Roll into a 12” cylinder. Cut cylinder into 6 pieces. Place on greased (or parchment lined) cookie sheet. Repeat with the other half of the dough.

(If you want to make them one day and bake them the next, cover with plastic wrap and refrigerate. Take rolls out of refrigerator and place in warm place to double in size. From original roll size, this will take about 1-1/2 hours.)

Let rolls rise until double in size (about 1 hour). Preheat oven to 375 degrees F. Bake rolls for 20-25 minutes. Let rolls cool a bit on a wire rack. While they are cooling, make the glaze. You can leave them in the pan and glaze the tops, or you can turn them out and glaze the bottoms. Drizzle glaze over the rolls. Leftover rolls (if there are any) can be refrigerated and then warmed in the microwave (20 seconds on high).

Makes 12 large size cinnamon rolls.

MAN-CATCHER BROWNIES
(shared with me by a friend)

12 oz (3 sticks) unsalted butter
2 cups sugar
2 cups packed light brown sugar
6 large eggs
2 Tbsp pure vanilla extract
2 cups regular cocoa powder
2 cups flour
1 tsp kosher salt

Preheat your oven to 350 degrees F. Take a 13x9x2 cake pan and line with parchment paper. Set aside. Melt the butter in the microwave and then add the cocoa powder. Set aside to cool for 5-10 minutes. In a regular bowl, combine the eggs with the sugar, brown sugar and vanilla extract. Blend together well with a whisk. Add this to the butter/chocolate mixture. Blend together well. Add the salt to the flour and then combine everything together gently. Spread the batter into the pan evenly. Smooth the top. Bake 40-45 minutes or until toothpick or cake tester comes out almost clean. Do not overbake. Cool completely before slicing.

CINNAMON WALNUTS
By Betty Rogers, www.allrecipes.com
(I always quadruple this recipe. It’s that good!)

1 cup sugar
1/3 cup evaporated milk
1 tsp ground cinnamon
1/4 tsp salt
1/4 tsp vanilla extract
3 cups walnut halves

In a heavy saucepan, combine the sugar, milk, cinnamon and salt. Cook over medium heat, without stirring, until a candy thermometer reads 238 degrees F (soft-ball stage). Remove from the heat; stir in vanilla and walnuts. Spread onto waxed paper to harden. Break into pieces. Store in an airtight container at room temperature.

You can order an autographed copy of my wonderful book The Cake & Cookie Closet: All Dolled Up in Sugar or pre-order The Cake & Cookie Closet presents Wedding Cookies, Volume 1 (to be shipped out the week of June 7, 2010), at a discounted price for being a Facebook fan. Click here for the link to the Facebook fan page. Click Like and then head to the Shop Now tab to get your copy today. It makes a great gift for your favorite baker.


Please also share this newsletter with people you know who love to bake. They can send me an e-mail at cakecookiecloset@aol.com to be added to the master newsletter list.


Sunday, May 16, 2010

May 2010 - The Beginning of The Blog


Come into The Closet with me… I’ll teach you to dream in sugar.

Welcome to the 1st edition of The Cake & Cookie Closet Newsletter. I appreciate you going on this journey with me to teach America how to “dream in sugar” and hope you’ll find the cakes or cookies featured and tips offered an important part of your baking arsenal.

This newsletter is broken into different “sides” – the cake side, cookie side, upcoming classes/events and companies I use. Since there are some people who like baking cakes and cookies, and others only interested in one of the two, I thought this would be an easier format to get to what you need quickly. Please send me an e-mail – cakecookiecloset@aol.com – with suggestions for other things you’d like to see in this newsletter. Happy baking and decorating! Debra

The Cake Side…

Important Tips/Resources

  • Completely read the recipe before beginning to make it. Sometimes people place ingredient information into the recipe that is not at the top.
     
  • All ingredients should be brought to room temperature unless noted otherwise.
     
  • Whenever I say “butter” I mean unsalted butter. I only use unsalted butter in baking. It’s much fresher. Also, some recipes say butter or margarine. I prefer the flavor and texture of butter instead of margarine.
     
  • I always line my cake pans with parchment circles before greasing/flouring the pan. Makes it easier to remove the cake.
     
  • Whenever you’re using a new flavor, i.e., coconut, remember that a little goes a long way. It’s easier to add a little more than taking it out.
     
  • Plan ahead. Give yourself time to bake your cakes without a lot of last minute stress. That’s how ingredients magically disappear. I’ve created several new recipes based on things that were left out of cakes. Supplies are too expensive to mess up your desserts.
     
  • Two websites every cake baker should be part of – http://www.cakecentral.com/ and http://www.allrecipes.com/. Both websites feature incredible recipes and sometimes share pictures so you can see what it is supposed to look like. Check out the comments on the allrecipes site for suggestions from people who made the recipe. They sometimes suggest changes that improve the taste.

Featured Cake Recipe


This is my all-time favorite chocolate cake recipe to make for special occasions. I top it with chocolate ganache and make homemade chocolate frosting to complete the fantasy in sugar. Here’s a picture done with the chocolate sour cream pound cake. This baby shower cake was done as a gift for my former attorney’s daughter-in-law. It was taken by Goodhart Photography. The complete story is at http://www.goodhartphotography.blogspot.com./


Chocolate Sour Cream Pound Cake

by Softasilk Cake Flour

2-1/2 cups sugar
1-1/2 cups butter or margarine, softened
5 large eggs
3-1/3 cups Softasilk cake flour
½ cup baking cocoa
1 teaspoon baking soda
¼ teaspoon salt
1 cup sour cream (I’ve used buttermilk as a substitution with no problem)
¼ cup boiling water
2 teaspoons vanilla

1. Heat oven to 325 degrees. Grease and flour 3 cake pans. (I’ve used 9” and 10” round cake pans lined with parchment circles, sprayed with butter/flour mixture and just spread the batter evenly between the three or you can use an angel food/tube pan. A scale works well for making sure you evenly distributing the batter between pans.)

2. Beat sugar and butter with an electric mixer on high speed until fluffy; beat in eggs, one at a time.

3. Mix flour, cocoa, baking soda and salt. Beat in flour mixture alternatively with sour cream, beating after each addition until batter is smooth, beginning and ending with flour mixture. Stir in boiling water and vanilla. Spread into pan(s).

4. Bake 30-40 minutes in 9” or 10” cake pans or 1-1/2 hours or until toothpick inserted into center comes out clean. Cool 10 minutes in pan before removing to cooling rack to completely cool.

Sugar Syrup

½ cup water
½ cup sugar

Combine water and sugar in a saucepan. Stir until sugar is completely dissolved in the water. Bring to a boil and then remove from heat. Let completely cool. Use a candy mold bottle to apply to your cake if you want to keep it super moist for a couple days. Allow the sugar syrup to be completely absorbed into the cake before applying the ganache.

Chocolate Ganache

1 (11.5 oz. package) Ghirardelli bittersweet chocolate chips, 70% cacao
1-1/3 cups liquid whipping cream
1 tbsp vanilla or Grand Marnier liqueur

Put chips in a large bowl; set aside. Heat whipping cream until it starts to boil. Remove from heat (or microwave) and pour over chips making sure all of the chips are completely covered. Let sit for several minutes. Add vanilla or liqueur to your mixture. Using a whisk, beat the mixture until completely smooth. It is ready to be used on top of cakes now. Let the ganache covered cake set until the ganache is firm before frosting the layers. Use your leftover ganache to make truffles after it becomes firm in the refrigerator.

Chocolate Fudge Buttercream Frosting
By Debra Steward via http://www.allrecipes.com/

1/2 cup butter
1/4 cup Crisco shortening
1/3 cup unsweetened cocoa powder
2-1/3 cups confectioners' sugar
2 tablespoons milk
1 cup hot fudge topping
1 teaspoon vanilla extract

Cream together the butter or margarine with the shortening. Sift the cocoa with the confectioners' sugar and add to the creamed mixture. Mix together adding 1 tablespoon at a time of milk to keep mixture smooth. Don't add more than 1/4 cup of milk. Add the hot fudge topping and the vanilla extract. Blend until smooth and creamy.

The Cookie Side…

Decorated Sugar Cookies – Tool Spotlight


Today’s spotlight tool for decorated sugar cookies is the Stitching (sometimes called “Quilting”) tool.

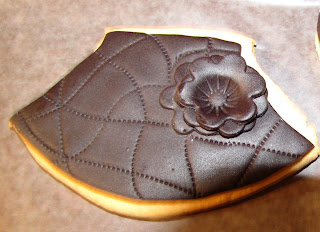
There’s another tool like this that makes solid lines (it has a large/small circle on either end). This stitching tool is perfect for rolling all over your fondant in different directions like the purse or in a pattern design like the shoes. I used it on my sneaker cookie as well to make the lines. It’s also perfect for making the stitch lines on hat, t-shirt or pants cookies. Use light and even pressure because if you press down too hard, you leave deep marks in your fondant. Practice before you apply it to your cookie so that you get the hang of it. Pretty soon, you’ll be embellishing everything with a few stitches!

Featured Cookie Recipe

I cannot remember where I found this recipe but the rave reviews keep coming in for it. I use a large cookie scoop and have 6 monster-sized cookies on a cookie sheet. You can make them smaller if you wish but the monster sized ones are a hit when given as gifts.

AWESOME Chocolate Chip Cookie Recipe

Author Unknown

1 cup butter, melted
1 cup butter, softened
3 cups brown sugar (packed well into measuring cup)
1/2 cup sugar
4 large eggs
5 tsp. pure vanilla extract (or you could substitute 5 tsp. Bailey's Irish Cream for a different flavor)
4 heaping cups all purpose flour (meaning that you just dip the one cup measure into the flour and then shake the excess off -- doesn't matter if the top is not completely level)
2 tsp. baking soda
1/2 tsp. salt
6 cups semi-sweet chocolate chips (you would substitute milk chocolate chips if you like those better)

Preheat the oven before you start putting together this recipe. Mix together in a mixing bowl (or KitchenAid mixer), the butter, brown sugar, sugar, eggs, and extract (or Bailey's Irish Cream if you chose to use it). Scrape down the sides of the bowl to make sure it's completely blended together.

In another bowl, sift together the flour, baking soda and salt. Add it slowly to the butter/sugar mixture. Add the chocolate chips and blend well.

Use your cookie scoop to portion the dough onto the parchment lined cookie sheet. The cooking time will vary according to your oven -- they're generally done in 10-12 minutes. I start them on the middle/bottom rack and then once you see the bottom part turn brown, I move them to the top rack and then put another pan of cookies on the middle/bottom rack.

Parchment paper helps make your cookies easy to remove from the pan and gives them all a uniform golden brown color on the bottom. I have twelve cookie sheet pans that I use when I'm making lots of cookies to speed up the process.

Enjoy!

May Class Schedule…

These cakes are part of my Miniature Hats/Miniature Purses class.


All classes listed below are being taught at Cookology in the Dulles Town Center Mall, Sterling, VA between Macy*s & Dick’s Sporting Goods on the lower level. I am currently working with Bob at Little Bitt’s in Wheaton, MD to schedule classes there either later this month or in June. I sent a proposal last month to Cakes Plus in Laurel, MD with suggested classes. Note: There are no classes scheduled at Fran’s Cake & Candy in Fairfax, VA this month. Classes will resume in June.

Fashionistas Rejoice
(Find out how easy it is to decorate fondant covered dresses, shoes, purses and hat cookies)
Saturday, May 15, 1-4 pm

 Decorating Cupcake Hats & Purses
(Learn how to cover miniature cupcake hats and easy to make cupcake purses)
Sunday, May 16, 2-4 pm
Decorating Sugar Cookies for Kids
(Kids learn how to design their own cookies the easy way)
Saturday, May 22, 2-4 pm
Decorating Wedding Sugar Cookies
(Have a wedding coming up? You want this class. Learn how to make diamond ring cookies, wedding cake, monogram designs, tuxedo and bow tie cookies.)
Sunday, May 23, 2-5 pm
Baby Shower Celebration Cookies
(Celebrate babies by learning how to make onesies, booties, bassinette, bottle and bib cookies.)
Sunday, May 30, 3-5 pm

Other Classes are Available

Don’t see a class you can attend above? I also do private classes, children’s classes at parties and girl’s night out classes. Please send me an e-mail for more information.

  
Companies to Check Out…

Listed below are some of my favorite companies. When you check them out, please make sure to let them know that I sent you to them. Thank you.

http://www.amoretti.com/ – I’ve started using their flavors to add amazing flavor to my buttercream frosting. Sandra Mallut contributed an incredible recipe to my book and can be reached by e-mail - sandramallut@yahoo.com - if you have any questions or would like to try a sample.

http://www.fondarific.com/ – My all-time favorite fondant to use. Check out their flavors and you’ll be in love.

http://www.globalsugarart.com/ – Alan and his gang have cake & cookie decorating tools and other products.

Now it's time for you to show off using the simple techniques I teach you to become a superstar cake and sugar cookie designer when you prepare cakes or cookies for that special woman in your life.  You can order an autographed copy of my new book The Cake & Cookie Closet: All Dolled Up in Sugar at http://www.thecakeandcookiecloset.com/.

 
 Please feel free to share the link to this blog with people you know who love to bake and decorate.

Thank you!